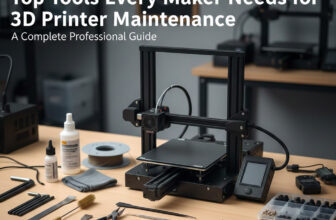
Most 3D printing discussions focus on slicer profiles, nozzle temperatures, filament choice, and hardware upgrades. Yet two of the most influential factors affecting print quality—lubrication and belt tension—are often overlooked entirely. In fact, even seasoned makers underestimate how critical these two mechanical fundamentals are in achieving consistent, smooth, accurate prints.
If your printer rattles, skips steps, produces inconsistent layer lines, or struggles with ringing, chances are high that the mechanical system—not your slicer—is the culprit. This article takes a deep dive into the rarely-discussed world of motion-system maintenance. You’ll learn how lubrication affects friction, why proper belt tension prevents motion error, and how the two work together to shape your final print quality.
This is a comprehensive, expert-level guide suitable for hobbyists, professionals, and engineering teams operating multiple 3D printers in a production environment.
Table of Contents
- Introduction: Why Mechanical Maintenance Matters
- Understanding Your Printer’s Motion System
- The Role of Lubrication in Smooth Printing
- Types of Lubricants and Their Proper Use
- Lubrication Techniques for Each Component
- Signs of Poor Lubrication and How to Diagnose Them
- Belt Tension: The Silent Determinant of Print Accuracy
- How Incorrect Belt Tension Affects Print Quality
- How to Check, Adjust, and Maintain Belt Tension
- Advanced Considerations: Alignment, Wear, and Calibration
- Best Practices for Long-Term Printer Health
- Maintenance Schedule (Beginner, Intermediate, Production Level)
- Common Mistakes and How to Avoid Them
- Conclusion: A Well-Maintained Printer Is a Reliable Printer
- FAQs
1. Introduction: Why Mechanical Maintenance Matters
Every 3D printer—whether a budget desktop model or an industrial machine—relies on a precise mechanical motion system. It doesn’t matter how advanced the firmware is or how high-quality your filament may be. If the printer’s mechanical components struggle to move smoothly, the machine cannot produce accurate results.
Two maintenance tasks disproportionately influence print performance:
- Lubricating moving components
- Maintaining correct belt tension
Most users adjust these only when problems emerge. But in reality, both are preventive maintenance tasks, not emergency fixes.
In high-end CNC machines, lubrication schedules are strictly enforced. Industrial motion systems are designed around predictable lubrication cycles. However, in the consumer 3D printing community, these practices are often treated as optional. The result? Preventable print issues, increased wear, and accelerated mechanical degradation.
This article aims to shift that mindset.
2. Understanding Your Printer’s Motion System
To understand why lubrication and belt tension matter, you must first understand how a typical FDM printer moves.
The system typically includes:
- Linear rods or linear rails
- Linear bearings
- Lead screws or ball screws
- Timing belts (usually GT2 belts)
- Pulleys and idlers
- Stepper motors Carriages and gantries
Each of these components must work together with minimal friction, minimal slack, and precise alignment. A single dry bearing or a loose belt can shift the entire gantry by fractions of a millimeter—small enough to ruin surface finish or create visible artifacts.
Smooth mechanical motion is not just about straight-line travel. It determines:
- layer consistency
- dimensional accuracy
- vibration levels
- positioning repeatability
- surface smoothness the stability of sharp corners
In short: your mechanical system is the skeleton and muscle of your printer. Without maintaining it, every other optimization is built on an unstable foundation.
3. The Role of Lubrication in Smooth Printing
Lubrication is responsible for reducing friction across the motion components. When the motion system is well-lubricated:
- bearings glide effortlessly
- gantries do not bind
- motors do not overwork
- vibrations are reduced the entire system operates with minimal resistance
Conversely, poor lubrication causes a cascade of mechanical issues:
- increased resistance
- skipped steps
- stuttering or vibration during travel
- ringing (echoing of sharp corners)
- layer inconsistencies
- accelerated wear on rods, rails, or bearings
- noisy operation
Proper lubrication isn’t just about convenience or noise—it substantially affects print quality. Even small increases in friction introduce micro-motion errors that translate into visible imperfections.
Why Many People Forget Lubrication
Because many printers function reasonably well when new, users assume lubrication is unnecessary. But lubrication from the factory is often:
- inconsistent
- low quality
- too thin insufficient for long-term use
After dozens of hours of printing, surfaces dry out. Dust accumulates. Bearings polish grooves into rods. This is when print quality begins to drop—often subtly at first.
4. Types of Lubricants and Their Proper Use
Different motion components require different types of lubrication. Using the wrong one can attract dust, degrade plastic parts, or even cause corrosion.
a. PTFE Dry Lubricant
- Great for linear rods
- Leaves a thin, non-sticky film
- Does not attract dust
- Excellent for open-frame printers
b. Lithium Grease
- Good for metal-on-metal systems
- Works well on lead screws
- Provides long-lasting coverage
c. Synthetic Grease
- High thermal stability
- Excellent for high-speed printers
- Suitable for linear rails
d. Silicone Lubricant
- Less effective for load-bearing components
- Safer on plastics
- Not ideal for linear bearings
e. Machine Oil (Light Oil)
- Sometimes used on rods
- Needs more frequent reapplication
- Can attract dust
Matching Lubricants to Components
| Component | Recommended Lubricant |
| Linear Rods | PTFE dry lube or light machine oil |
| Linear Bearings | Synthetic grease or lithium grease |
| Linear Rails | Synthetic grease |
| Lead Screws | Lithium grease |
| Z-Axis Nuts | Lithium or synthetic grease |
| Pulleys/Idlers | Usually no lubrication needed |
Using the correct lubricant ensures longevity and smooth operation without introducing contamination.
5. Lubrication Techniques for Each Component
A detail-oriented approach ensures proper application.

PlanetSafe Lubricants 3D Printer Grease
Linear Rods
- Clean with isopropyl alcohol.
- Apply a thin line of lubricant.
- Move the carriage manually to distribute it evenly.
Linear Rails
- Remove dust with compressed air.
- Apply grease sparingly to the rail groove.
- Run the carriage back and forth to absorb excess.
Lead Screws
- Clean threads thoroughly.
- Apply grease to a few threads.
- Run Z-axis through full travel.
Bearings
- If accessible, inject grease with a needle-tip applicator.
- Otherwise, lubricate the rod/rail and allow bearing motion to distribute.
Frequency
- Light-duty hobby use: every 200–300 hours
- Heavy use (production): every 100 hours
- Dusty environments: every 50–100 hours
6. Signs of Poor Lubrication and How to Diagnose Them
Lubrication-related problems are easy to misdiagnose. Many users mistakenly blame slicer settings or filament quality.
Common symptoms:
- squeaking or grinding noises
- rough motion when the printer is off
- Z-wobble or ridged layers
- inconsistent extrusion (caused by vibration)
- shifting or hesitation during travel
- sudden increase in ringing or ghosting
- visible banding that does not match extrusion issues
Diagnosis Method
- Power off printer.
- Move the extruder/bed manually along each axis.
- Note any roughness or resistance.
- Inspect rods/rails for scratches or uneven sheen.
- Check for excessive dust buildup on bearings or rods.
If motion is not smooth and continuous, lubrication is overdue.
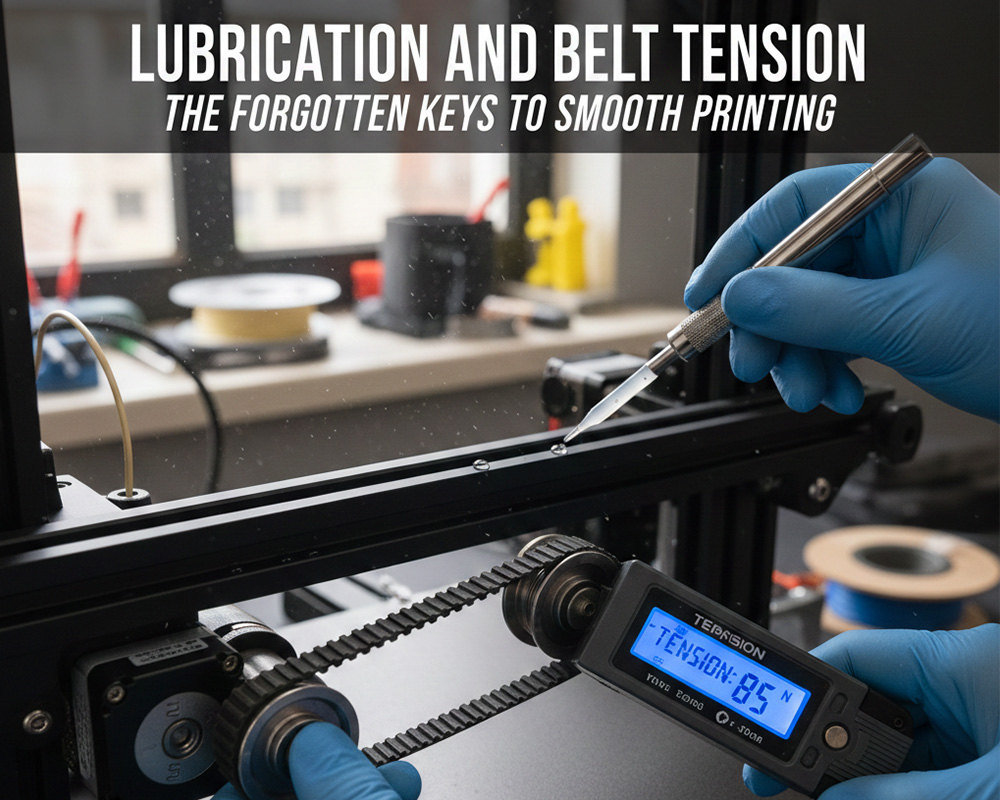
7. Belt Tension: The Silent Determinant of Print Accuracy
Belts are responsible for transferring rotational motion from stepper motors to linear motion across the X and Y axes. Even if your printer is well-lubricated, incorrect belt tension undermines the motion system.
Belts must be neither:
- too loose
- nor too tight
The correct tension allows:
- consistent positioning
- crisp corners
- accurate dimensions
- minimized backlash
- reduced vibration
Many users assume belts never need adjustment. In reality, they stretch over time, especially during long periods of high-speed printing.
8. How Incorrect Belt Tension Affects Print Quality
If the Belt Is Too Loose
- ringing or ghosting
- sloppy or rounded corners
- inaccurate dimensions
- shifting layers
- inconsistent extrusion due to motion lag
- visible “wiggle” artifacts in tall prints
If the Belt Is Too Tight
- increased friction on bearings
- premature wear on idlers and motor bearings
- stepper overheating
- shortened belt lifespan
- noisy operation
- micro-stuttering in diagonal movements
A properly tensioned belt behaves like a musical instrument string—firm, but not rigid.
PlanetSafe Lubricants 3D Printer Grease
9. How to Check, Adjust, and Maintain Belt Tension
Checking Belt Tension
There are several effective methods:
a. Finger test
Press the belt gently at the midpoint; it should deflect slightly under moderate pressure.
b. Frequency test (advanced)
Professionals measure belt frequency using apps or tuners.
Typical ranges for GT2 belts:
- X-axis: 90–120 Hz
- Y-axis: 80–110 Hz
c. Motion smoothness test
Move the carriage manually; the motion should be smooth but firm.
Adjusting Belt Tension
Most printers include tensioners on the X and Y axes.
- Loosen the tensioner screws.
- Pull or adjust until the belt reaches the desired tension.
- Re-tighten securely.
- Move the axis through its full range to verify smoothness.
- Re-check tension after a few hours of printing—belts settle.
Maintaining Belt Alignment
Even if tension is correct, misalignment can cause:
- uneven wear
- belt fraying
- increased friction
- inaccurate motion
Check that:
- belts run parallel to rods/rails
- belts do not rub against edges
- pulleys and idlers are perfectly aligned
A misaligned belt can degrade within days under heavy use.
10. Advanced Considerations: Alignment, Wear, and Calibration
For users operating multiple printers or printing professionally, deeper mechanical calibration is valuable.
a. Checking Pulley Set Screws
Loose pulleys cause sudden shifts or gradual drift. Ensure every pulley’s set screw is fastened against the motor shaft’s flat.
b. Identifying Worn Belts
Replace belts if:
- teeth look polished
- belt ribs appear shiny
- small cracks develop
- belt tension fluctuates
c. Proper Idler Bearing Health
Worn idlers increase friction; replace if noisy or rough.
d. Gantry Squareness
Misaligned gantries increase wear on belts and bearings. Check using:
- machinist squares
- digital calipers
- front and side alignment tests
e. Motor Current Calibration
Motors that run too hot or too weakly worsen the effects of incorrect belt tension.
11. Best Practices for Long-Term Printer Health
A well-maintained printer prints faster, more accurately, and more reliably. Incorporate these practices:
- Keep the printer dust-free.
- Avoid excessive lubricant application.
- Inspect belts visually every 50–100 hours.
- Clean rods and rails regularly.
- Avoid overtightening hardware.
- Replace worn parts proactively.
- Log hours or usage cycles for each printer.
12. Maintenance Schedule
For Home/Hobby Users
- Lubrication: every 200–300 hours
- Belt tension check: monthly
- Cleaning: every 20–30 hours
For Heavy Power Users
- Lubrication: every 100–150 hours
- Belt tension check: every 2–3 weeks
- Linear rail inspection: monthly
For Production Environments
- Lubrication: every 80–100 hours
- Belt tension check: weekly
- Replace belts every 6–12 months
13. Common Mistakes and How to Avoid Them
Over-lubrication
Excess grease attracts dust, leading to sludge buildup.
Using automotive or household lubricants
These often degrade plastics or become sticky.
Ignoring pulley alignment
A misaligned pulley destroys belts quickly.
Tightening belts to fix ringing
Ringing is usually caused by vibration—not loose belts alone.
Neglecting Z-axis lubrication
The Z-axis is slow, but essential for consistency.
Assuming factory lubrication is sufficient
It never lasts long.
14. Conclusion: A Well-Maintained Printer Is a Reliable Printer
While firmware updates and slicer tweaks are exciting, the true foundation of print quality lies in mechanical maintenance. Lubrication ensures fluid motion. Proper belt tension guarantees accuracy and repeatability. Together, they reduce wear, extend component life, and dramatically improve print performance.
The smoothest, most reliable printers are not always the most expensive—they are the ones that are cared for meticulously.
If you want consistently excellent results, make lubrication and belt tension part of your regular workflow. These two often-forgotten tasks are not just maintenance—they are the keys to truly smooth printing.
FAQs
1. How often should I lubricate my 3D printer?
Most users should lubricate every 200–300 hours. Heavy users should lubricate every 100 hours or sooner.
2. Can I use WD-40?
The standard WD-40 spray is not recommended. It is a solvent, not a long-term lubricant. Use PTFE dry lubricant or synthetic grease instead.
3. How tight should printer belts be?
They should be firm but not rigid. A properly tensioned belt deflects slightly when pressed. Too tight or too loose both cause problems.
4. How do I know if my belts need replacing?
Replace them if teeth are shiny, cracks form, or tension changes frequently.
5. What happens if I never lubricate my printer?
Friction increases, bearings wear prematurely, print quality degrades, motors overwork, and mechanical failure eventually occurs.
6. Should linear rails be lubricated differently from rods?
Yes. Rails require a high-quality synthetic grease applied sparingly to the grooves, while rods often use PTFE or light oil.
7. Does belt tension affect dimensional accuracy?
Absolutely. Loose belts cause delayed movement and overshoot; tight belts cause friction and skipped steps.